Key Takeaways
- Clean your data before touching a chart as gaps and bad headers cause messy output
- Match chart type to your message: bar for comparisons, line for trends, pie for parts of a whole
- Spend five minutes in the Customize tab fixing colors, font sizes, and axis labels
- Export as SVG for crisp quality on big screens, PNG for general use
- Link your chart to Google Sheets when pasting into Slides so it stays updatable
Introduction
So you've got a Google Sheet full of numbers and a presentation coming up, and you're thinking, "How hard can it be to turn this into a nice chart?" Honestly, not that hard. But there's a gap between a chart that exists and a chart that makes people in a room nod and actually understand your point.
Most people click Insert > Chart, get whatever Google Sheets decides to give them, and call it done. That usually results in something that looks fine in a spreadsheet and terrible on a big screen.
To properly make presentation charts from Google Sheets, you need to go a few steps further. Things like cleaning up your data, picking the right chart type, doing some light formatting work, and then getting it out of Sheets and into your slide deck without losing quality. None of this is complicated. It just needs a bit of intention.
This guide walks you through all of it. No charts degree required!
First, Get Your Data Right Before You Even Touch a Chart
This part people always skip and then wonder why their chart looks weird.
Google Sheets builds charts from whatever data you highlight. If your data is messy, your chart will be messy. So before doing anything else, clean things up.
Keep your headers in the first row. One header per column, clear and short. "Q1 Sales" is fine. "Total Revenue Generated by the Sales Team in Quarter 1 of the Current Fiscal Year" is not. That header will end up in your chart legend, and it'll wrap all over the place.
Remove any blank rows or columns inside your data range. Google Sheets gets confused by gaps and sometimes includes them as zero values, which throws off the whole picture.
If you have totals at the bottom of a column, don't include them in your chart selection unless you specifically want to show the total as a bar next to everything else. Usually you don't.
Once your data looks clean and organized, you're ready to actually build something.
How to Make Presentation Charts from Google Sheets Step by Step
Select your data range, then go to Insert > Chart. Google Sheets will pick a chart type automatically based on what it sees. Sometimes it guesses right. Often it doesn't.
The Chart Editor opens on the right side. This is where all the action happens.
Picking the Right Chart Type
This matters more than most people realize. The chart type you choose shapes how people read your data, and choosing the wrong one can make your information genuinely harder to understand.
Bar or column charts are your safest bet for comparing things side by side like sales by region, performance by quarter, headcount by department.
Line charts are great for showing how something changes over time. Monthly revenue, weekly traffic, temperature trends. If time is involved, a line chart almost always makes more sense than a bar.
Pie charts work only when you have a few categories that add up to a whole. Use sparingly. More than five slices and it turns into a mess that nobody can read.
Scatter plots show relationships between two variables. Good for more analytical presentations, not always great for general audiences.
For a full reference, Google's own support page on choosing chart types is actually pretty useful. Once you pick the right type in the Chart Editor under "Chart type," move on.
Customizing Your Chart So It Doesn't Look Like a Spreadsheet Threw Up
The default Google Sheets chart styling is functional but honestly a bit bland. It uses a white background, default blue bars, and axis labels in a generic font. For a spreadsheet, fine. For a presentation slide, nope, you can do better.
Click on the "Customize" tab in the Chart Editor. Here's where you'll spend most of your time.
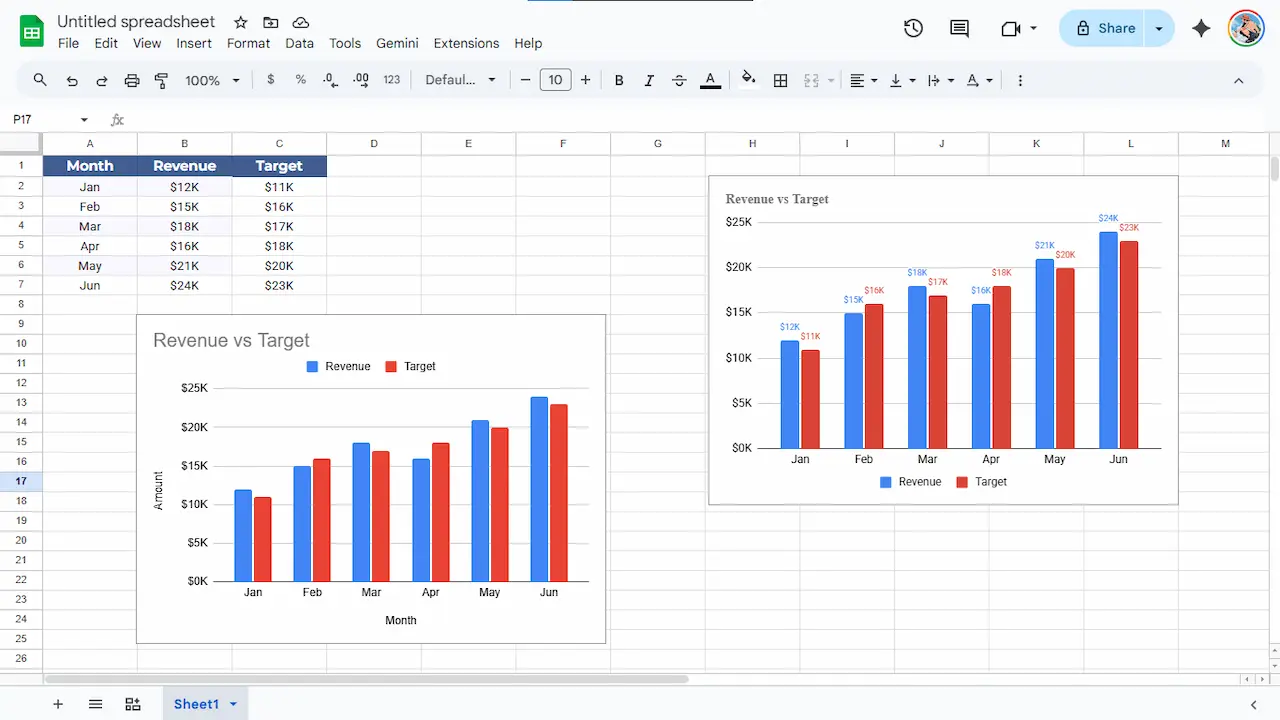
Go to "Chart & axis titles" and add a real title. Not "Chart 1." Something like "Q1 Revenue by Region" or "User Growth: Jan–Apr 2025." A clear title means your audience doesn't have to guess what they're looking at.
Under "Series," you can change the color of your bars, lines, or slices. Match them to your company's brand colors if you can. It looks intentional and professional. Even just switching from the default blue to a color that fits your slide theme makes a big difference.
Under "Chart style," you can turn off the background or set it to transparent, which helps a lot when your slide has a dark or colored background.

Chart Design Tips That Make a Real Difference
Colors, Fonts, and Gridlines
Keep colors simple. Two or three max if you can help it. When every bar is a different color, the eye doesn't know where to land. Use color to highlight, not to decorate.
Gridlines are another one people don't think about. By default they're there, faint, which is fine. But for a clean presentation look, sometimes removing them entirely gives your chart a more polished feel. You can reduce or remove them under "Gridlines and ticks" in the Customize tab.
Font size matters on a big screen. What looks fine on your laptop can be tiny when projected. Bump up your axis labels and title font size at least a couple notches from the default.
Chart Titles and Labels
Data labels (the actual numbers shown on bars or points) can be really helpful in presentations because your audience can't hover over things the way they could in an interactive tool.
Turn them on under "Series" in the Customize tab. But don't go overboard. If your chart has 20 bars each with a label, it's visual noise. Use data labels when you have fewer data points or when a specific number is the whole point.
Pro Tip
Always preview your chart at the actual presentation size before the meeting. What looks great at 100% on a monitor can turn muddy when projected. Zoom in, zoom out, check from a few feet back.
How to Get Your Chart Into a Presentation
Copy-Paste Into Google Slides
This is the most common path, and it works well. Click your chart in Sheets to select it. Then click the three-dot menu in the top-right corner of the chart and hit "Copy chart."
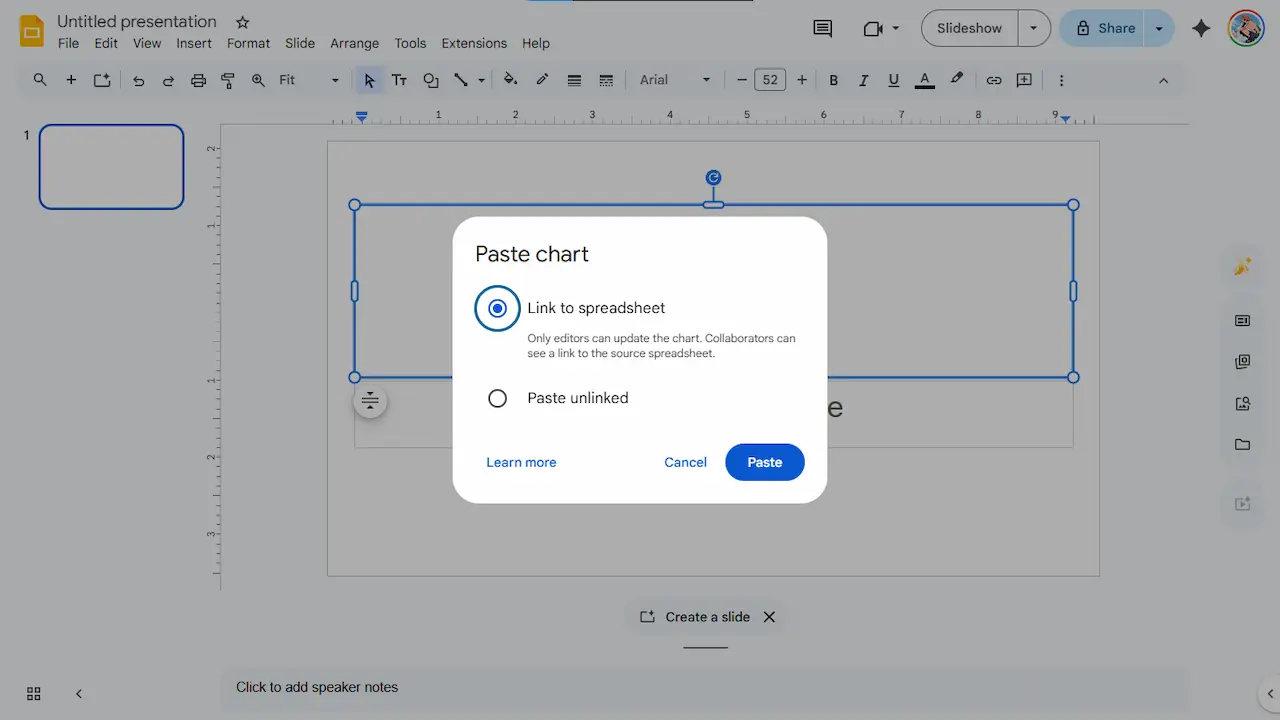
Go to your Google Slides presentation and paste. A dialog box will ask whether to link to the spreadsheet or paste unlinked. Linking is great because if you update your data later, you can refresh the chart in Slides with one click. Unlinked means the chart is a static snapshot.
For most presentations, linked is the smarter choice.
Download and Drop Into PowerPoint or Canva
If you're working in PowerPoint, Canva, Keynote, or anything outside of Google's ecosystem, you'll want to download the chart as an image.
Click on the chart, hit the three-dot menu, go to "Download," and choose PNG for general use or SVG if you want to scale it without quality loss. SVG is sharper on big screens. PNG is fine for everything else.
Then just drop the image file into your presentation software.
When Google Sheets Isn't Quite Enough
Google Sheets covers the basics really well. But there are times you want something more visual, more styled, or a chart type that Sheets just doesn't offer natively.
That's where DataViz Kit comes in handy. It's a free, browser-based collection of chart-making tools with no account needed, and no software to install. You paste your data in, tweak your chart, and export it as an SVG or PNG file ready to drop into any presentation.
If you work with bar graphs a lot, the bar graph maker on DataViz Kit lets you fine-tune things like axis ranges, color schemes, chart titles, and Y-axis controls in a way that's a bit more hands-on than what Sheets offers.
It's a good complement to Google Sheets, not a replacement. Use Sheets for your data, use DataViz Kit when you want to punch up the visuals a bit.
Make Better Charts in Minutes
Free, browser-based chart tools. No account needed, just paste your data and go.
Explore Free Chart ToolsA Few Things Most People Get Wrong
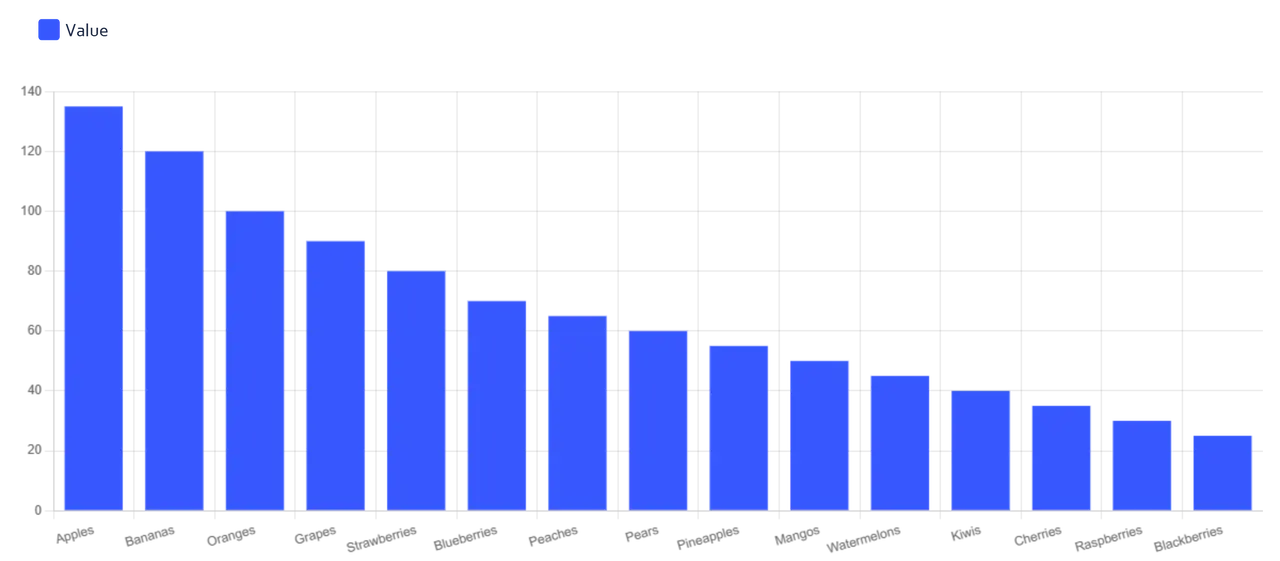
Overcrowding the chart. Fitting 15 categories into one bar chart might seem thorough, but it just makes a mess. If you have that many categories, either group some together or split into multiple charts.
Skipping the axis labels. Your audience should never have to wonder what the numbers on the side actually mean. "Revenue (USD)" or "Users (Thousands)" makes a big difference in how quickly someone reads your chart.
Using 3D effects. Google Sheets offers a 3D look for some charts. Avoid it. It looks dated, and it makes values harder to compare accurately. Flat charts are just cleaner and more credible.
Not thinking about color blindness. Around 8% of men have some form of color vision deficiency. If your whole chart relies on red versus green to tell a story, a chunk of your audience might miss it. Use patterns, labels, or different shades rather than just color alone.
One more thing: always preview how your chart looks on the actual presentation, not just on your laptop screen. What looks great at 100% on a monitor can turn muddy when projected.
Wrapping Up
Making a chart in Google Sheets isn't hard. Making one that actually holds up in a real presentation, on a real screen, in front of real people, that takes just a bit more care.
Clean your data first. Pick a chart type that fits what you're saying. Spend five minutes in the Customize tab fixing colors, titles, and font sizes. Then get it into your slide deck properly, either linked from Sheets or exported as a clean image file.
If you want more control over how your charts look without learning a whole new tool, check out the free chart makers at DataViz Kit. They're quick, browser-based, and built for people who care about how their charts look.
And remember: a good chart is one your audience understands in the first five seconds of looking at it. If you're spending more time explaining the chart than the data itself, the chart isn't doing its job.